Concert Team

The big day is here - so what Are youR responsibilities?

Event Manager

Welcome and thanks for being our event manager today!

You are the glue that binds all the parts together, you need to ensure teams are supported, guest and performers looked after and the whole day running smoothly from every angle. Here are the basics:

  • Arrive and ensure venue is all good.
  • Bump in stage gear and ensure production team and stage crew are underway preparing stage.
  • Setup performer check-in and front of house stations.
  • Hang posters and banners.
  • Train up MC, Production Team, Stage Crew and Front of House using links and QR codes.
  • Hustle everyone.
  • Arrange food and drink for team.

Overview:

  • Brief and Manage Stage Crew: These are your heavy lifters, direct them clearly, give them concise instruction. Assign roles of strength; eg guitarists help guitar students, adjust amps etc. Be aware of any shifts or changeovers - brief newcomers quickly.
  • Manage Gear Bump-In Backline, instruments, check off the list, make sure everything is ready to go. Make sure line-checks have been done, work directly with the sound crew.Brief and coordinate MC(s) Make sure the MC is clear on when they need to be on stage Work with them closely to facilitate a good flow; time management, audience vibe etc. This is your first person to update on any changes to the runsheet, otherwise the audience won’t know what’s happening.
  • Facilitate Performer Check-In in conjunction with the Green Room Manager. Primarily understand the performers present, update the stage runsheet as necessary and communicate changes with the MC and Sound Crew. Go to the green room and cut off check-in 20 mins prior to the concert start, only schedule latecomers at the end if there is time. Meet with the Green Room team to finalise the runsheet for the concert and give them an idea of what chance there is of fitting in late-comers should there be any.
  • Direct people and traffic back-stage Make sure students know where and when they need to be. Delegate crew members to check students are ready, tuned and have communicated any needs (chair, mic stand, music stand, accompaniment etc) If students are missing something, help where you can (capo, strap, etc) If they’re expecting anything different from what the runsheet says (like a backing track), communicate with the soundcrew. Keep track of people; one parent may come back stage to support a younger student, but move on anyone unnecessary or not welcome. Teachers may also choose to support their own students.
  • Direct equipment requirements for changeovers Mics, mic stands, music stands, guitar leads, amps, DIs. Cross check with runsheet, communicate anything different to sound crew.
  • Communicate with FOH team You will need to communicate when you’re ready for the doors to open and when the show will be starting. Direct MC to start show.
  • Troubleshoot issues Be ready to jump in and problem solve, you’ve been provided a Stage Kit to assist with various issues which may arise.
    Manage Gear Bump-Out Check off list, direct stage crew.

Good To Remember:

  • Setup and decorate the front of house and performer check in tables.
  • Make sure the internet is working and all laptops are setup with keap passwords and access. Ensure that ticket register and slack are also opened.
  • Hang the posters for students around the venue using blu tack. Hang the posters for the staff at the different stations.
  • Place the banners on the stage and around the venue to help clients find where to go and to ensure our brand is present and visible.
  • Put out bins and put bin liners in each.
  • Setup photo wall and banners.
  • Do basic training with each of the team to ensure they have read through and understood their role in the day.
  • Arrange meals and drinks for the team.

FRONT OF HOUSE

The Front Of House Team's Role:

The Front of House Team is charged with helping performers and their guests get into the venue safely and ready to play. Your role is to create and facilitate great experiences outside of the performance in activities, encouragement, fun, good vibes, support etc. Performing live is a big deal so we do everything we can on the day to make the experience as care free and positive as possible. To do this you will be given resources and instructions to work with on the day.

Setting Up:

  • Setup tickets and performer check in table.
  • Tidy the hall.
  • Do float sheet

Ticket Sales:

  • Ask all groups if there is a performer amongst them, check them in if so.
  • Process tickets for performers and guests.
  • Seating is not allocated, first in first served.

Performer Check-In:

  • Performers need to check in upon arrival.
  • Mark these on a program as you go.
  • Support, encourage and help performers feel good about the performance and talk through any aspect with them.
  • Give them a program and explain that getting on stage will be explained to them at the start of the show.

Starting The Show:

  • At the start of the show, head down to the MC and instruct them to start the show.
  • After doing this, speak with the MC and stage crew and make sure they know which performers have and have not shown up, as well as any changes made to the timetable.

During Show:

  • Bins – replace bin liners as required.
  • Noise – make sure this is kept at a minimum.
  • Late entrants – to enter hall between acts – not during acts.
  • Show Transitions

Pack Down:

  • After the shows have been completed for the entire day, pack down the table and stock.

Your Joblist:

Brief And Manage FOH And Welcome Team:

  • These are your team members, direct them clearly and delegate appropriately.
  • Be aware of shift changeovers, brief newcomers quickly.
  • Communicate emergency exits, bathroom locations etc with all members.

Manage Gear Bump-In:

  • Check list off as bringing all gear in.

Setup Area:

  • Booths as per layout map
  • Direct any food vans/coffee trucks
  • Door ticket check area
  • Welcoming area
  • Signs
  • Any pre-show activities (red carpet, media wall, etc)

Facilitate Stormer Booths:

  • Ticket sales
  • Merchandise
  • Pre-Show activities

Welcome And Direct Students And Parents:

  • Be welcoming and supportive of all performers, students and parents.
  • Direct performers to the Green Room to Check-In. Younger students may be accompanied by one parent, but the Green Room is special for performers. Runners to help and supervise students as they find their way.
  • Direct audience members to the pre-show area, make sure they know where they’re going and where to buy tickets if they haven’t already.

Open Doors:

  • Open the doors and check tickets once the Stage Manager (Name, Mob) has confirmed they are ready.
  • Manage doors during concert - only allow people to enter between acts, police noise levels.

Bins:

  • Manage rubbish, replace bin liners etc as needed throughout the event.

Manage Bump-Out:

  • Pack up booths and FOH gear
  • Check gear list off again as gear is put back in the truck.
  • Liaise with the event manager for when it is appropriate to begin this process, it will differ for different concerts and may be possible to start while the final concert is happening.

Performer Check In:

Setup Booth:

  • Make sure you have the stage runsheet(s) for all shows, and pens ready to go.
  • Setup table and attach sign in clear and readable location at entrance of Green Room.
  • Clipboard provided in GreenRoomKit if standing makes more sense at venue.

Check-In:

  • Check performers off as they arrive against all acts they’re a part of. Be aware of people in multiple acts.
  • A parent may accompany younger students in the green room, but make sure they’re aware that they’ll need to purchase a ticket before entering the concert.
  • Give instructions to performers, introduce them to relevant crew members. (who might help tune their guitar, or who to tell if they need a chair).
  • Talk through tech requirements with performers, note any differences from runsheet. (gear needed, backing tracks, etc) This is the easiest time to catch unsubmitted backing tracks and get them to the sound crew.
  • Close off normal check-in (time prescribed in production schedule) before the concert start time so you can communicate any changes to the runsheet and discrepancies in gear requirements with the Stage Manager.
  • Leave instructions for late check-in if you leave the booth, add latecomers to the end of the runsheet if possible, work with the Stage Manager to work out what there is time for, explain to performers that you will do your best, but there may not be time.

Run Green Room Brief And Manage Green Room Team:

  • These are our most student engaged team members, direct them to make students feel welcome, help them relax and give them a great Pre-Show experience during initial check-in.

Manage Gear Bump-In And Setup Of Green Room:

  • Setup a relaxing and welcoming space for students, with the snacks, tables and activities provided in the Green Room Kit.
  • Prepare for performer Check-In as per the Performer Check-In Instructions.

Work Directly With The Stage Manager:

  • This is one of the most important communication channels in the whole organisation of concerts. The Stage Manager needs to know if anyone hasn’t shown up and needs prompt updates so they can keep the stage runsheet up-to-date.
  • Prioritise getting updates to the Stage Manager with plenty of notice.
  • Stick strictly to Check-In deadlines and follow Late Check-In protocols otherwise.
  • The Stage Manager has the final call on who goes on stage and when.
  • Meet with stage manager 20 mins before each concert starts to finalise runsheet.

Manage Traffic:

  • This is a special place for performers. Some guardians may be necessary for younger performers, but keep it student focused and police any unwanted people.
  • Consider guest artists/performers; they may need a private section, riders arranged, meet and greet or signing facilitation. If unsure, talk to the FOH Manager or Event Manager. They also may have their own management or security. Facilitate this, but respectfully keep the area student focused.

Organise Food/Meals For Staff And Volunteers:

  • Organise appropriate food/meals at times prescribed in production schedule.
  • Time this so food arrives and is ready to be eaten.
  • Remove this section if local Vendor options are locked in.

Coordinate Pack-Down And Bump-Out Of Gear:

  • Check off gear as packed up.
  • Liaise with the event manager to determine when the green room is no longer needed and pack-down can begin.

MC

The MC's Role:

The MC role is about keeping the show rolling and the crowd engaged. It's also about celebrating our incredible performers who have stepped up to the stage. Here is a quick overview of what you will be doing and some tips/strategies on how to do that well.

Arrival:

Be there atleast a half hour before the first show and setup side of stage.

Pre-Show:

Grab a program and map out your announcements. You should do quick announcements at the finish of every song to thank the performer and introduce the next act.

Welcome Students:

Students are to arrive three acts before theirs and be side of stage. When we open the doors the first three of these acts will come straight to you, be ready to welcome them and show them where to wait.

Performer Check-In:

Do a final callout to make sure all performers have checked in with the stage crew and are ready to go. Invite anyone who has not done so to come down right away and do that.

Last Minute Changes:

At the start of the show one of the Front of House team will come side of stage and signal for you to open the show. Make sure the stage manager knows you are heading on and get out to get started.

Starting The Show:

Welcome everyone, build atmosphere and cover the following in your opening:

  • Acts must arrive side of stage three acts before theirs.
  • Welcome everyone. - Ask them to put phones on silent.
  • Tell acts to come side of stage three acts before theirs to get ready.
  • Explain concert and what it is about.
  • Ensure first three acts are ready - call them up if not.

Reactive Work:

You will need to watch the stage at all times ready to handle stuff as it happens (technical glitch, performer stress etc.) You may be required to head up on stage at unplanned times and keep things rolling. Be ready. We may also ask you to call for acts from the audience who have not show up.

Bigger Setups:

Where there is a bigger setup (band/choir etc.) you should aim to have some material prepared to share with the audience, some information about a performer, something about SM, a joke, a story or about the concert so you can buy some time in the transition.

Buzz:

If you feel the room has low energy try and lift them up, get them excited and listening. Get their attention. You set the energy for the room, so be upbeat and happy!

Go With The Changes:

Mark these on your program and communicate them with your audience – particularly to performers.

No Show Performers:

The front of house team will let you know if a performer has not shown up. Make an announcement to see if they have arrived and be ready to handle changes if not.

Performer First:

Every performer today deserves their moment, focus completely on them and in service of them, we do not put down, make fun of or throw our performers off of their game.

Student Interviews/Questions/Fun:

Engage students, ask them about themselves and their journey put them on mic if they are comfortable or ask them before they go up and give them a plug. Here are some suggestions:

  • Acknowledge, get 1st and 2nd time performers, explain.
  • Celebrating the musicians journey.
  • How long have you been playing?
  • What music do you like?
  • What’s your best tip or advice for someone who is trying to learn music?
  • What is your dream guitar/drum kit?
  • Best gig they ever went to.
  • What song they are working on at the moment.
  • If you could play any song...
  • Best thing about lessons.

Between Shows:

Tidy your backstage area. Take a moment, breathe and rest.

After Show:

Tidy the backstage area before leaving.

Photographer

The Photographers Role:

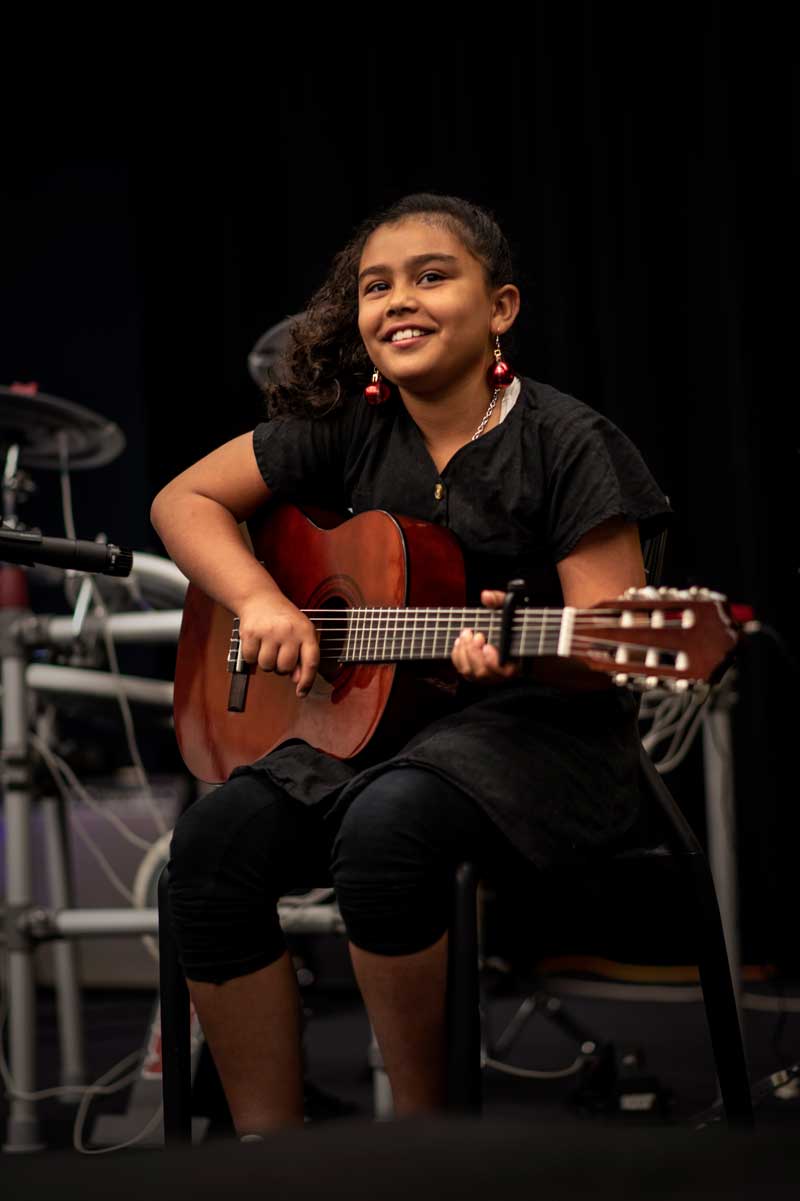
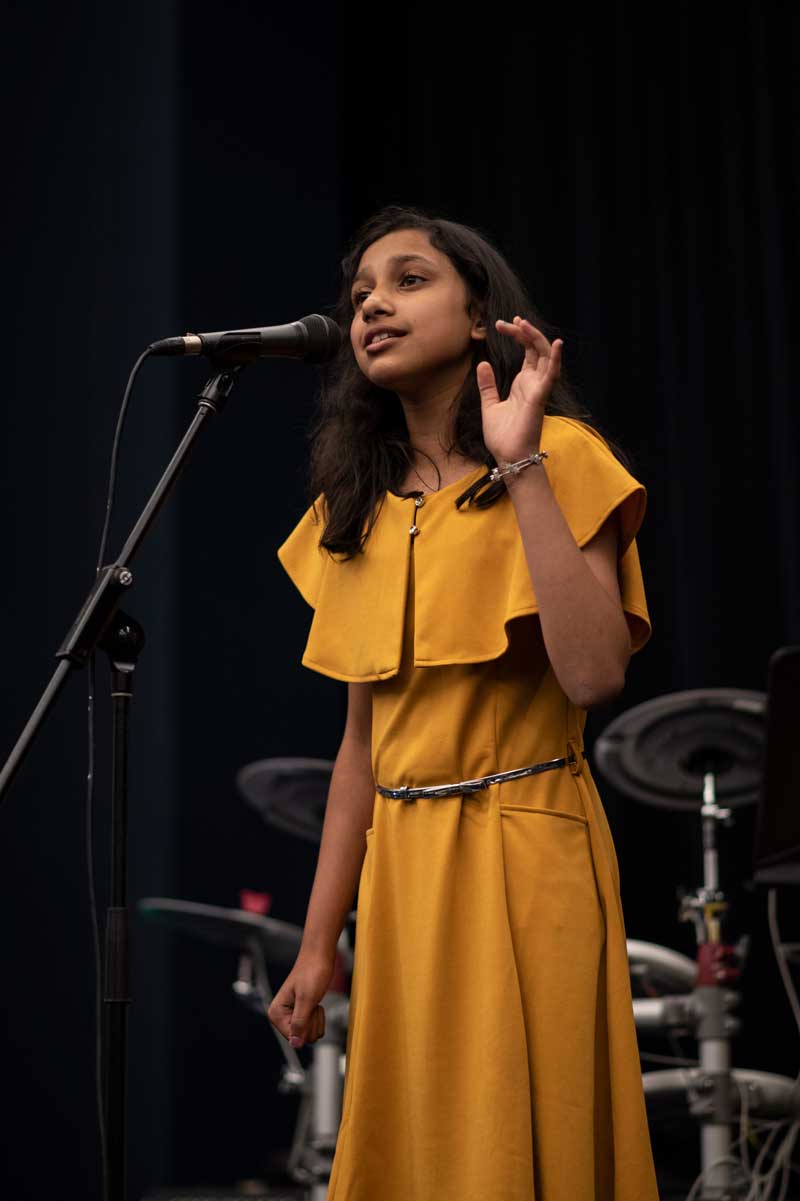
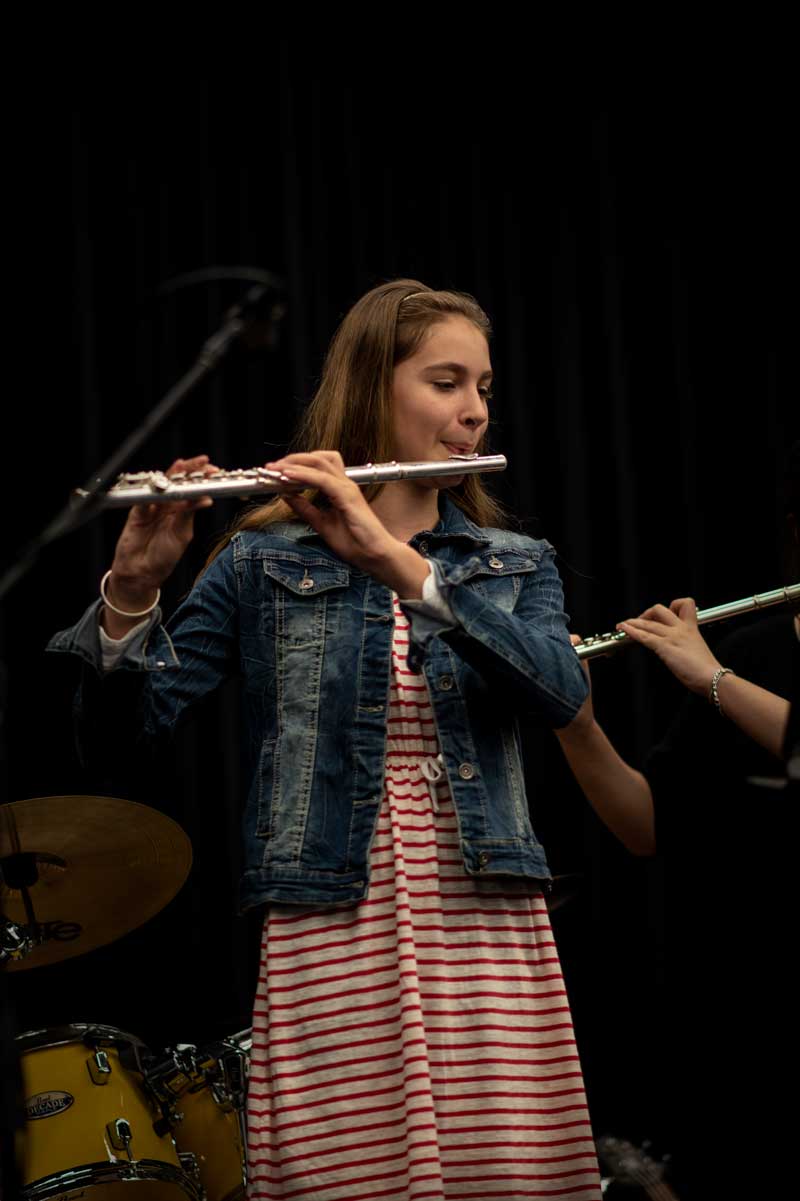
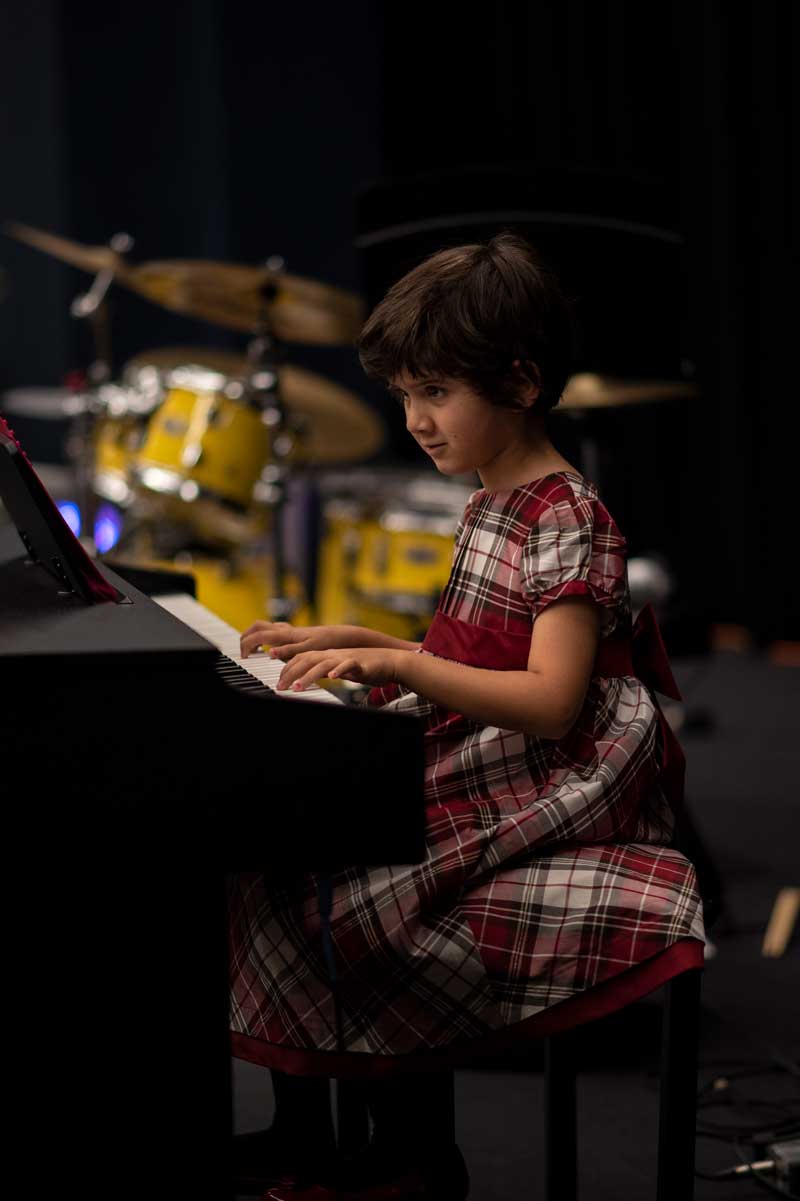
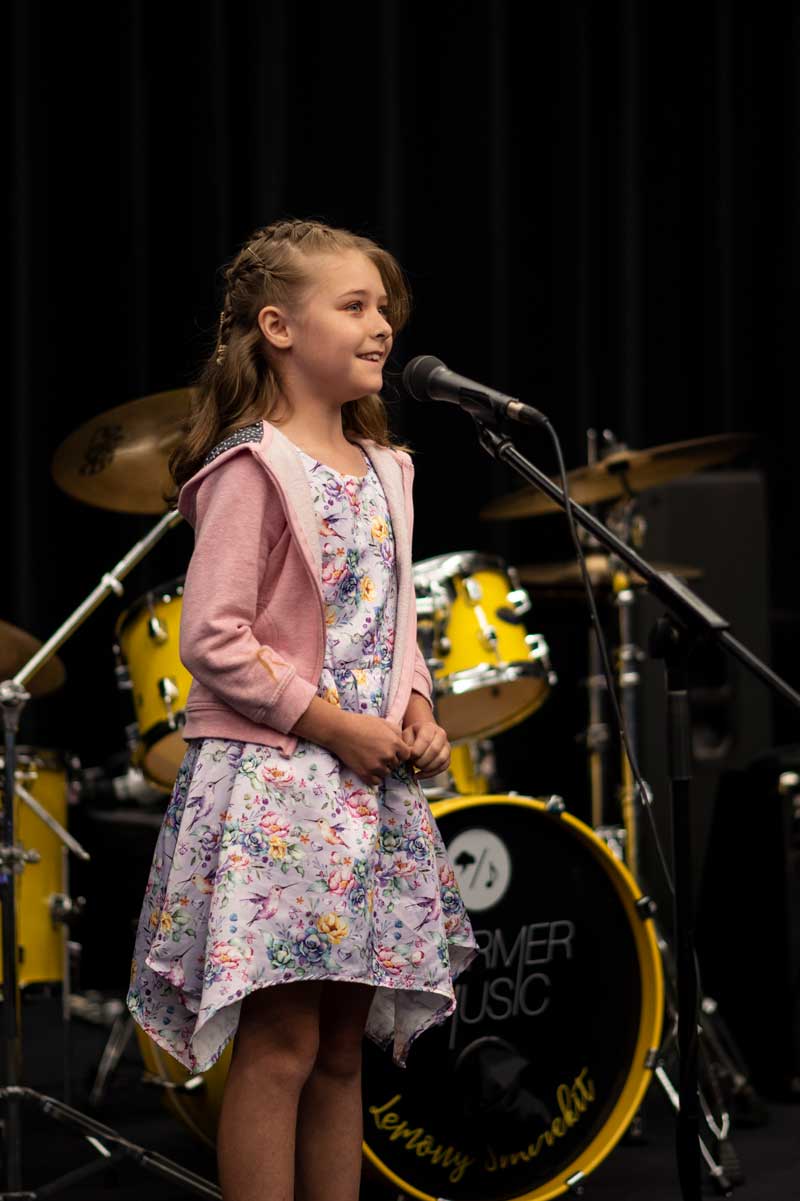
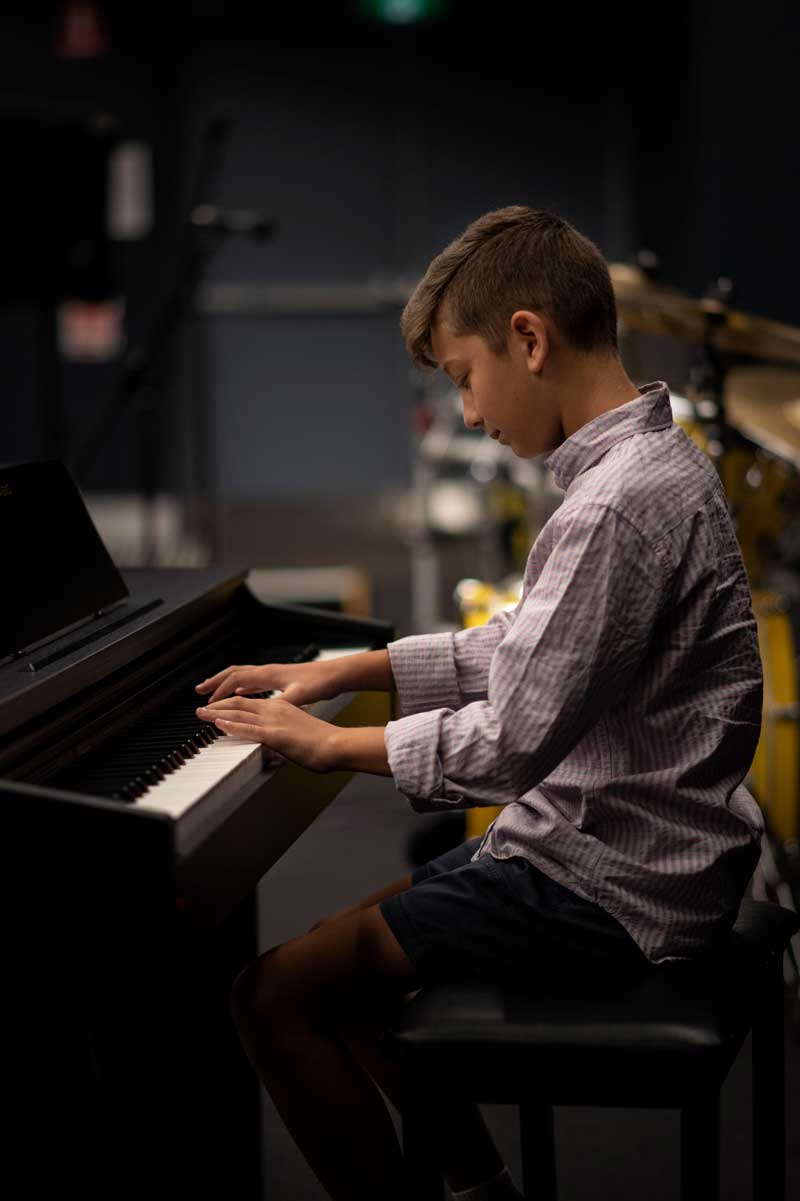
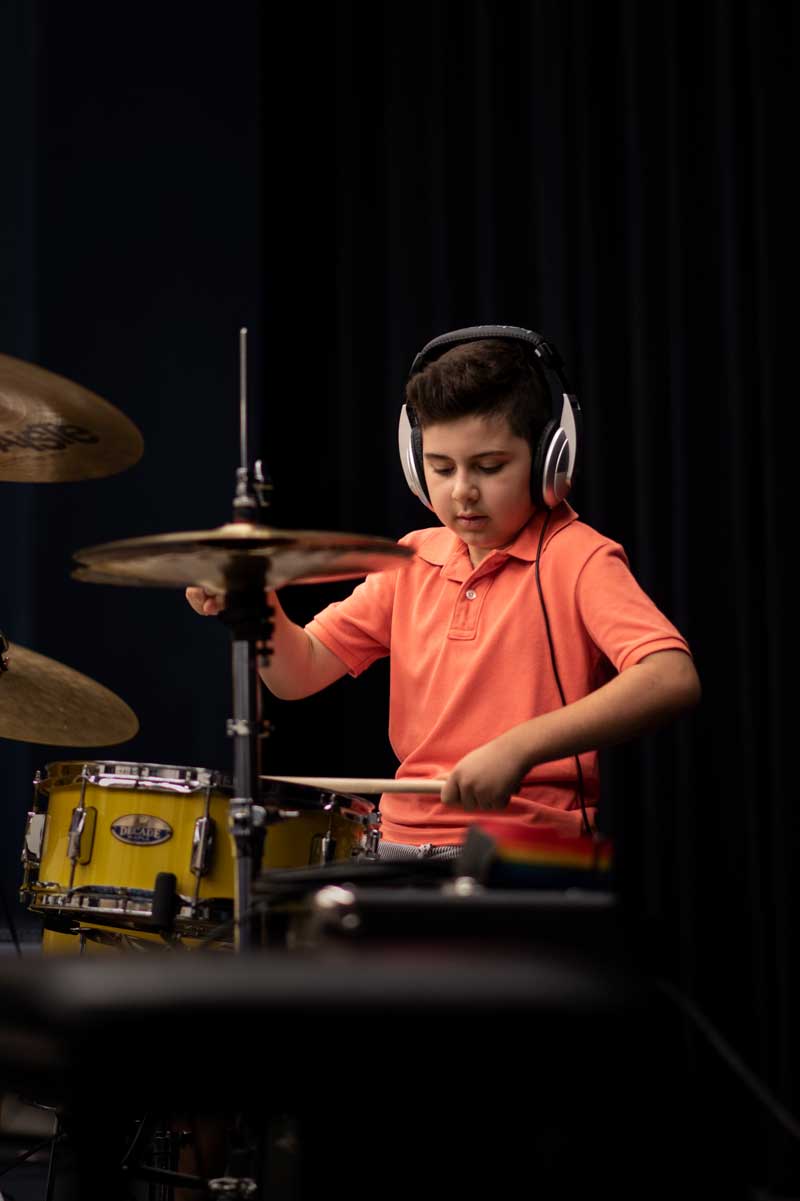
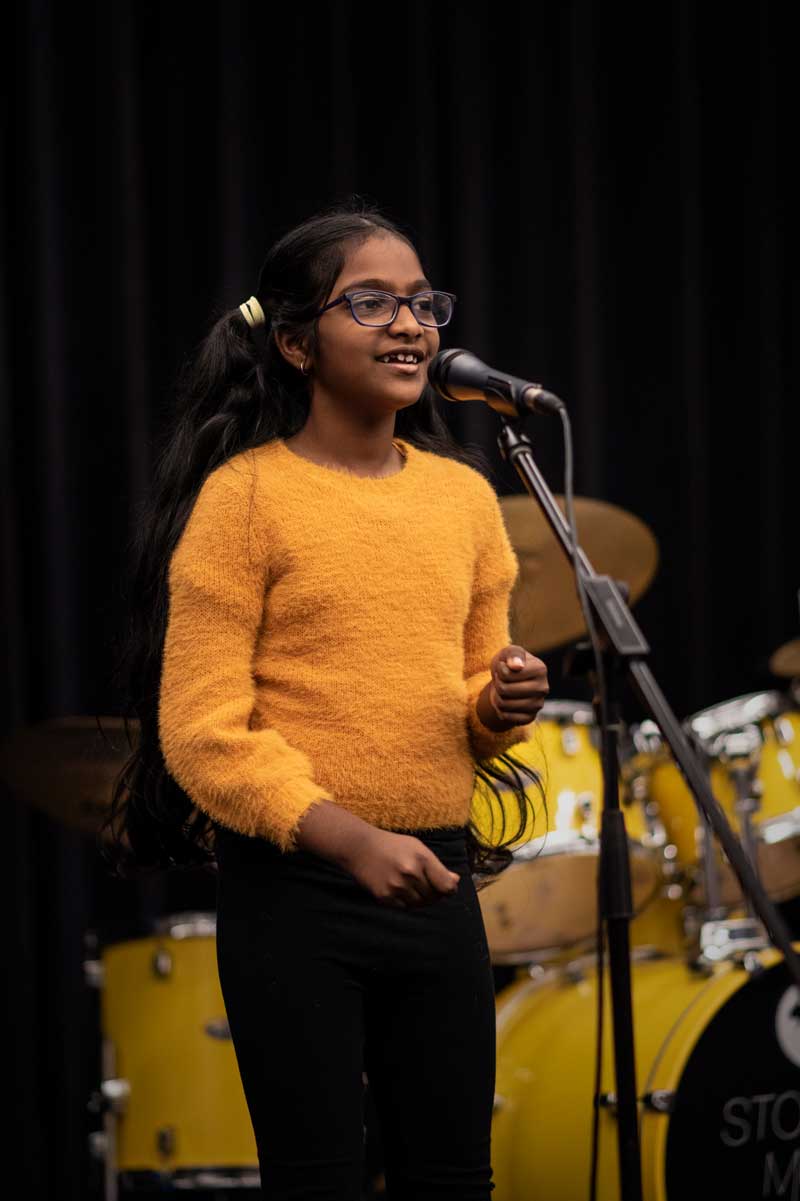
The photography team is charged with capturing the fun, nerves, beauty and memories of the concert from shots of the performers on and off stage, audience reactions, interviews and everything to tell the story and celebrate our students achievements. The focus should be on joy, celebration and happiness. You should venture to capture the rollercoaster ride of performing and the inspiration that is seeing a young musician pouring their heart into a song. It's powerful stuff. We would love a mixture of photo and video. High res stills to capture moments but live video to capture the sound and movement when it is right. Capturing short interviews pre and post performance can also be a powerful way to tell the story.  We'd also love for you to catch moments of collaboration, teachers helping students, students playing together, parents encouraging their children. Togetherness, unity and teamwork. To see the kind of pictures we have loved in the past, see the example images towards the bottom of this page.

Pre-Shoot Checklist:

  • Clean lens and camera shutter before starting.
  • Make sure all batteries are fully charged.
  • Make sure memory cards have been formatted and are empty.
  • Make sure gimbal is tuned and ready.
  • Make sure all charger chords are available for recharging during the event.
  • Find power outlet before concert for charging equipment.

Single Performer Photography:

  • Use appropriate lens (35mm, 50mm, 85mm).
  • Check Iso (do not go above 2000, do not use a flash to compensate for low light, the flash will distract the performer and the audience).
  • Set a fast shutter speed to avoid blurring of moving performer.
  • Use a wide aperture to allow more light and allow separation between performer and background (1.4f - 2.8f).
  • Find 3 locations that give an unobstructed view of the performer (left side, right side, front view).
  • Set exposure on the performers face (not clothes, backdrop or instrument).
  • Side angle photos should include at least part of the face and instrument.
  • Front side photos should include the performers entire face and instrument.
  • We can take a rear view shot of the audience from over the performers shoulder however do not distract the performer whilst doing this (do not let the performer know you are behind them and do not get close to the performer).
  • Do not include rest of stage when shooting, each photo should give an illusion that the performer is on a small stage setup directly for that performer (we do not want the performer to be small on a giant stage).

Editing:

  • Import image into Camera Raw for colour and tone adjustment.
  • Correct exposure if necessary.
  • Correct white balance if necessary.
  • Increase clarity by 10.
  • Decrease Texture by 20.
  • Raise whites by 10.
  • Drop blacks by 10.
  • Drop highlights by 20.
  • Raise shadows by 20.
  • Import into Photoshop.
  • Clone background layer (never edit background layer).
  • Remove any distracting details from image.
  • Add S curve adjustment layer (use blending mode luminosity).
  • Add a slight fade adjustment layer to add a matte finish.
  • Add a black radial gradient filter (inverted) at 30$ - 40% opacity.
  • Save as high res JPEG (incase the parents would like the image).
  • Save alternative mid level JPEG for socials.

Production Team

The Productions Teams Role:

The production team is charged with getting the desk, lights, stage and sound setup and running beautifully at the concert. Before starting any jobs, please read through this sheet carefully and map out how you are going to run the show. Feel free to take notes, plan things out, while we think the workload is manageable, there are many things to remember and take into account so plan and stick to the instructions and it all should go well. Stormer Music Concerts are a variety show featuring many different instruments and students in quick performances one after another. Some will play for a matter of seconds, others a big longer. Most students will perform solo, some will use a backing track, some will perform as a duo, trio or band.

Setup desk, speakers, lines etc. These are to be provided by you and need to support the following possible configurations:
  • Instrument mic's for solo acoustic instruments.
  • Microphone near side of stage for exclusive MC use.
  • DI's for electric instruments supporting up to two acoustic guitars, two electric pianos and an electric drum kit.
  • Mic's, stands and cabling for up to five singers at once.
  • Acoustic drum mic's (basic configuration is ok).
We will provide the following on stage gear, please ensure you have mic's and cabling to support them:
  • 2 Guitar Amps (40w-60w)
  • Bass amp (60w)
  • Stage Piano (line out)
  • Electric drum kit (line out)
  • Acoustic drum kit
Students will bring their own instruments, music and pedals.


Setting Up:

We recommend you have everything setup and ready 45 minutes before the show starts at the latest. This will allow you to troubleshoot and work through the process as needed. By setup we mean:
  • Have full PA setup and running.
  • Have background music running (please bring family friendly mix on a device). We would like this music running before and after shows and during in longer setups during the show - keeping the vibe up.
  • Work with stage crew to get levels and instruments correct and to mark out the stage so instruments don't get shuffled around.
  • Designate MC Mic.
  • Have backing tracks ready and setup - these will be provided to you via google drive link prior to the show, you need to bring these on a device with the capacity to run live sound.
  • Have programs ready to monitor what is going on. These will be sent to you via a share drive also.

Stage Setups:

This will mostly be done by the stage crew however you will need to keep an eye on the layout and how things are being placed as it will affect your capacity to work well. The performers are mostly divided amongst the following instruments; piano, vocals, drums and guitar. These soloists may require chairs, music stands and foot-stools; speak to the student when they arrive to determine what they need from you. For drum and piano solos your input will be minimal as the instruments and gear are basically setup ready for them to go. For vocal and guitar students you will be more involved and should be ready to set up as listed below.
  • Keyboard: Piano/Keyboard performing students as mentioned have minimal setup requirements, though for young performers you may need to assist them to move the piano stool closer or further away from the piano, or to help them set up their music on the stand. For several of the items involving keyboard, there will be a tutor and a student playing at the same piano. For this, please provide an extra chair by the piano stool.
  • Drums: Drummers will have minimal need for you to assist in their setup, and any adjustments to the kit or gear will be handled by our drum tech. Please ensure there is a set of headphones or great foldback for backing tracks.
  • Unamplified Classical Guitar: These will mostly be a young performer playing a short melody, often along with sheet music. The student will usually sit down, and will need a microphone trained at the sound-hole of the guitar. If the student is reading from music they will need a music stand, and if the student is short in stature, they may require a footstool under the foot in which they are supporting their guitar.
  • Unamplified Brass/Woodwind/Strings: The same as unamplified classical guitar just using a directional instrument mic for them.
  • Amplified Guitar/Bass Guitar: This setup is as above, however the student is performing on either an electric guitar/bass which should be run through the amplifier, or a steel string guitar with a pickup, which should be run through a DI.
  • Singers: Positioned in front of the microphone closest to the centre of the stage and assisted in adjusting the mic’s height and position if required.
  • Singing/Playing: There are several items where a performer will be singing and playing or being accompanied by someone else. We still deem this a type of solo in terms of the setup. Remember to consider both elements (for example the piano and the microphone when setting up for such items).

Running The Show:

Here are some good to knows for running the show. 
  • Be Quick: Work quickly and efficiently and prepare for larger items before they happen. The day will drag big time if we aren't doing quick changes and short sharp performances. 
  • Backing Tracks Check: Students will come and speak with you to make sure you have their correct backing track before the show, be ready for this. 
  • Stage Watching: Make sure you are watching what is going on on-stage in case something happens (think drooping microphones etc.) you and the stage crew are the first point of call on this and should act straight away. 
  • Missing Performers: If the student doesn’t show up be ready for program changes. 
  • Worst Case Scenario: During the show please be ready to handle technical difficulties that may occur with our musicians on stage (instrument not working, breaking a string etc.) and while it is impossible to be prepared for every scenario, but just be ready to help if the occasion requires it.

STAGE MANAGER

The Stage Teams Role:

The Stage Crew is charged with getting the gear and performers ready and playing at the concert. Please find everything you need to know below.

Summary:

  • Gear And Staging: Set up gear as required for each performance.
  • People Management: help people backstage, encourage performers and make sure everyone is where they need to be.
  • Troubleshooting: If something is going wrong on stage soundwise, address it.
  • Between Shows: Reset/clean backstage.
  • Performer Check-In

Setting Up Stage Gear:

Bump In: Help carry all gear from van/truck inside.
  • Chairs: Place these as required and return them to their place after use.
  • Music Stands: Place these as required and return them to their place after use. When placing the stand try not to block the performer off completely from the audience.
  • Microphones: Singers and some instrumentalists will require microphones. Most of the microphones will be on stands and should remain on the stage for the duration of the concert. Direct performer’s to their correct microphones and assist where necessary in adjusting the mic-stand to the performer’s specifications.
  • Piano: The stage piano will remain on the stage and in the same place for the duration of the performance, you may need to lead a student there during the performance.
  • Amps/Leads: There are two amplifiers – one for bass guitar, the other for electric guitar. The settings will be setup during sound check and you should only adjust the sound as instructed during training. 

Setting Up The Stage:

The performers are mostly divided amongst the following instruments; piano, vocals, drums and guitar. These soloists may require chairs, music stands and foot-stools; speak to the student when they arrive to determine what they need from you. For drum and piano solos your input will be minimal as the instruments and gear are basically setup ready for them to go. For vocal and guitar students you will be more involved and should be ready to set up as listed below.
  • Keyboard: Piano/Keyboard performing students as mentioned have minimal setup requirements, though for young performers you may need to assist them to move the piano stool closer or further away from the piano, or to help them set up their music on the stand. For several of the items involving keyboard, there will be a tutor and a student playing at the same piano. For this, please provide an extra chair by the piano stool.
  • Drums: Drummers will have minimal need for you to assist in their setup, and any adjustments to the kit or gear will be handled by our drum tech.
  • Unamplified Classical Guitar: These will mostly be a young performer playing a short melody, often along with sheet music. The student will usually sit down, and will need a microphone trained at the sound-hole of the guitar. If the student is reading from music they will need a music stand, and if the student is short in stature, they may require a footstool under the foot in which they are supporting their guitar.
  • Amplified Guitar/Bass Guitar: This setup is as above, however the student is performing on either an electric guitar/bass which should be run through the amplifier, or a steel string guitar with a pickup, which should be run through a DI.
  • Singers: Positioned in front of the microphone closest to the centre of the stage and assisted in adjusting the mic’s height and position if required.
  • Singing/Playing: There are several items where a performer will be singing and playing or being accompanied by someone else. We still deem this a type of solo in terms of the setup. Remember to consider both elements (for example the piano and the microphone when setting up for such items).
  • Horn Section: Will set themselves up, if there is a student performing in this section ensure their instrument has a mic.

Before The Show:

  • Meet Your Team: Get to know your team, you’ll be counting on each other for the next few hours.
  • Get Familiar With Your Job: Go through the information below and try and plan who will handle what during the show.
  • Get Familiar With The Setup: Have a look at the setup both on stage and off stage. Locate the key pieces of gear and equipment:
  • Get Familiar With The Program: Go through the program and plan out what you will need for each act.

Doors Open:

  • It is your responsibility to decide when to open the doors for the next show. To start this process check with the sound crew that everything is ready and then head to door and open.
  • Check the tickets of the performers as they come in.

Performer Check-In:

All performers need to check in side of stage with you. Tick them off on a program and make sure they have followed QR code to performer instructions.
  • If there is a performer who has shown up but has not been put on the program, add them into the program and confirm when they will be.
  • If someone has NOT shown up make sure MC and Sound Desk are aware.

During Show:

Update Projector so that program shows properly on display.

Between Shows:

  • Close the doors and get everyone out of auditorium.
  • Reset stage in terms of gear, leads, mic’s, amps etc.
  • Troubleshoot issues.
  • Rest a moment.

Bump Out:

  • At the end of the final performance begin packing down the stage immediately. Bump out to the van will begin once audience and performers have cleared the space.

Some Points Of Consideration:

  • Parents: Parents/guardians of younger students are welcome backstage with their children if they wish to.
  • Stage Left/Right: For clarification “stage left” means your left as you stand on the stage and look into the audience (and vice versa for “stage right”).
  • Stage Watching: Make sure you guys are watching what is going on on-stage in case something happens (think drooping microphones etc.) you are the first point of call on this and should act straight away.
  • Entering And Exiting The Stage: All student performers must enter stage left and exit stage right.
  • Program And Arrival Times: During the show students will arrive three songs before their own.
  • Performers As Part Of Your Team: Some of your team may have to leave at a certain point to perform on stage plan the timing of these together.
  • Police: Only crew, performers and their guardians are allowed backstage. If someone is backstage and they shouldn’t be - you should ask them to leave.
  • Be Quick: Work quickly and efficiently and prepare for larger items before they happen.
  • Noise Backstage: During the show please keep backstage noise to an absolute minimum.
  • Backstage Management: Keep the area clutter free.
  • Missing Performers: If the student doesn’t show up, notify the stage manager.
  • Gear Care: Please show care for our gear, chairs should be stacked neatly and instrument leads should be coiled correctly and placed safely in their place etc.
  • Worst Case Scenario: During the show please be ready to handle technical difficulties that may occur with our musicians on stage (instrument not working, breaking a string etc.) and while it is impossible to be prepared for every scenario, but just be ready to help if the occasion requires it.

VIDEOGRAPHER

The Videographers Role:

 
Each year we run multiple concerts as a chance for our students to perform for a supportive audience of family, friends and peers. These performances will range from 20 second nursery rhymes through to multiple band songs. They are always incredibly inspiring and an important part of the life of our school as we celebrate our students efforts in lessons. Your role is to create and facilitate great experiences outside of the performance in activities, encouragement, fun, good vibes, support etc. Performing live is a big deal so we do everything we can on the day to make the experience as care free and positive as possible. To do this you will be given resources and instructions to work with on the day.

Focus And Technique:

The focus should be on joy, celebration and happiness. You should venture to capture the rollercoaster ride of performing and the inspiration that is seeing a young musician pouring their heart into a song. It's powerful stuff. We would love a mixture of photo and video. High res stills to capture moments but live video to capture the sound and movement when it is right. Capturing short interviews pre and post performance can also be a powerful way to tell the story.  We'd also love for you to catch moments of collaboration, teachers helping students, students playing together, parents encouraging their children. Togetherness, unity and teamwork. To see the kind of pictures we have loved in the past, see the example images towards the bottom of this page.

Pre-Shoot Checklist:

  • Clean lens and camera shutter before starting.
  • Make sure all batteries are fully charged.
  • Make sure memory cards have been formatted and are empty.
  • Make sure gimbal is tuned and ready.
  • Make sure all charger chords are available for recharging during the event.
  • Find power outlet before concert for charging equipment.

Single Performer Photography:

  • Use appropriate lens (35mm, 50mm, 85mm).
  • Check Iso (do not go above 2000, do not use a flash to compensate for low light, the flash will distract the performer and the audience).
  • Set a fast shutter speed to avoid blurring of moving performer.
  • Use a wide aperture to allow more light and allow separation between performer and background (1.4f - 2.8f).
  • Find 3 locations that give an unobstructed view of the performer (left side, right side, front view).
  • Set exposure on the performers face (not clothes, backdrop or instrument).
  • Side angle photos should include at least part of the face and instrument.
  • Front side photos should include the performers entire face and instrument.
  • We can take a rear view shot of the audience from over the performers shoulder however do not distract the performer whilst doing this (do not let the performer know you are behind them and do not get close to the performer).
  • Do not include rest of stage when shooting, each photo should give an illusion that the performer is on a small stage setup directly for that performer (we do not want the performer to be small on a giant stage).

Editing:

  • Import image into Camera Raw for colour and tone adjustment.
  • Correct exposure if necessary.
  • Correct white balance if necessary.
  • Increase clarity by 10.
  • Decrease Texture by 20.
  • Raise whites by 10.
  • Drop blacks by 10.
  • Drop highlights by 20.
  • Raise shadows by 20.
  • Import into Photoshop.
  • Clone background layer (never edit background layer).
  • Remove any distracting details from image.
  • Add S curve adjustment layer (use blending mode luminosity).
  • Add a slight fade adjustment layer to add a matte finish.
  • Add a black radial gradient filter (inverted) at 30$ - 40% opacity.
  • Save as high res JPEG (incase the parents would like the image).
  • Save alternative mid level JPEG for socials.
 

Example Images

Below are some sample images we have loved in the past.